
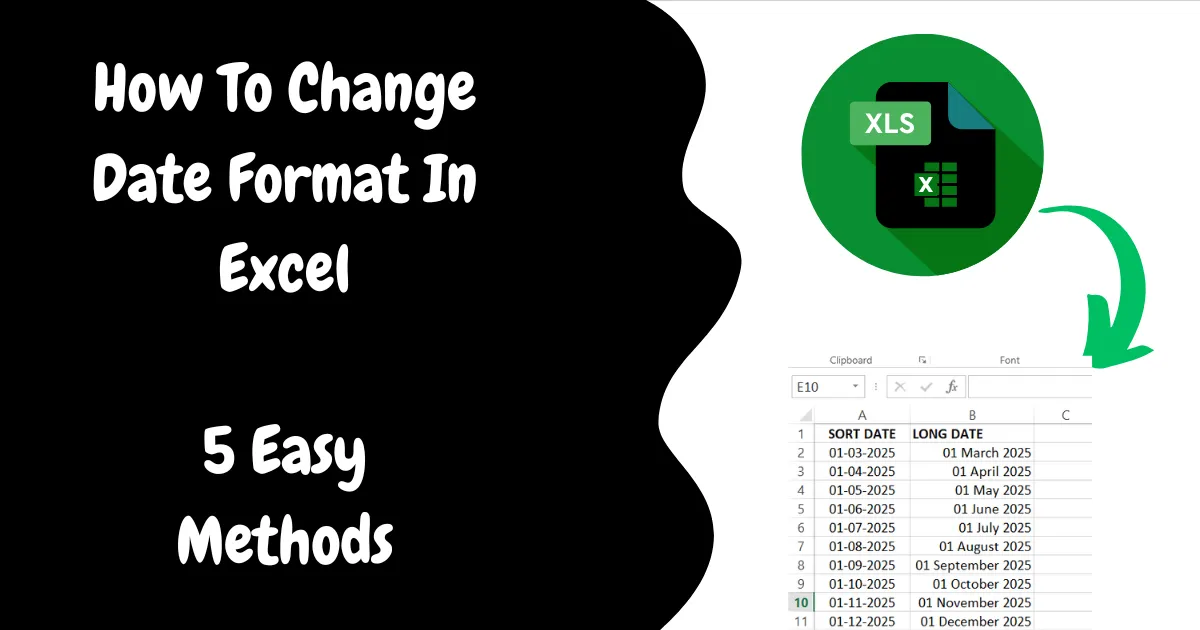
How To Change Date Format In Excel: Hi friends! If you’re here, it means you want to learn How To Change Date Format In Excel. This guide will show you a simple and easy ways to do it.
Changing the date format in MS Excel is a useful tool that lets you show dates in different ways. Excel gives you many choices to display dates, whether you’re working with a lot of data or just keeping track of a few events.
So, Let’s start reading this article till the end!
How To Change Date Format In Excel
By following these steps, you can adjust date formats to fit your needs. Keep trying out Excel’s tools to get better at managing data and working efficiently. Here are five methods provided:
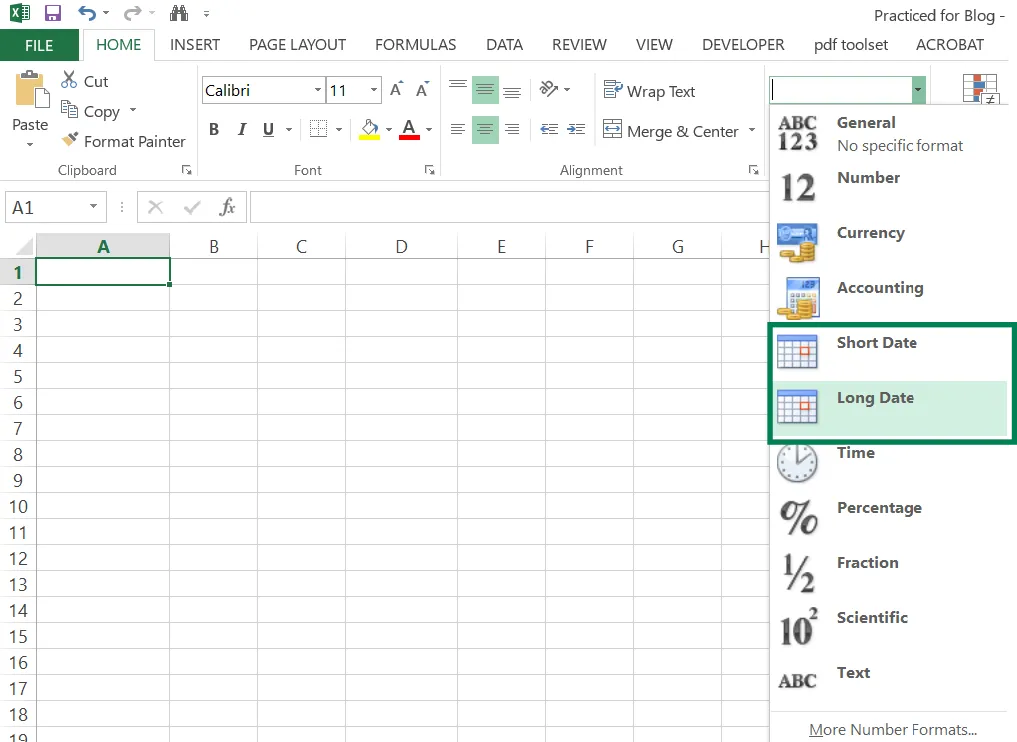
Method 1: Change Date Format Using the Ribbon
One easy way to change the date format in Excel is by using the ribbon. You can choose between “Short Date” (like 01-01-2023) or “Long Date” (like January 1, 2023). If you need a different format, you’ll have to use other methods.
Steps to Change Date Format:
Step 1: Select the cells with the dates.
Step 2: Go to the Home tab in the ribbon.
Step 3: In the Number group, click the dropdown menu.
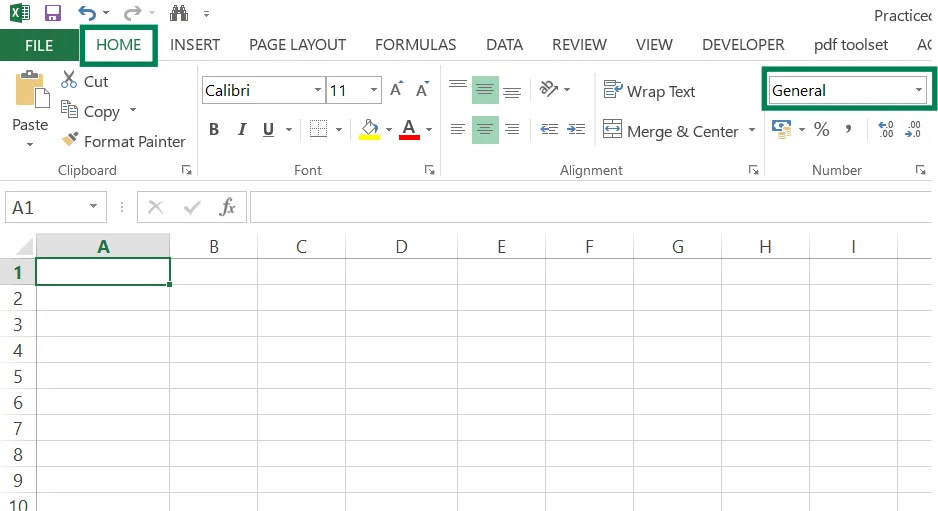
Step 4: Choose either Short Date or Long Date.
The dates will instantly change to the selected format. The options you see here come from your computer’s region settings. For example, if your system is set to the UK, the short date might look like dd/mm/yyyy. If you change the format in your computer’s settings, it will also update in Excel.
Note: This only works if Excel recognizes the data as dates. If the dates are in text format, this method won’t work.
Method 2: Change Default Date Formats in Excel
The default date formats in Excel come from your computer’s settings. To change them:
Step 1: Open the Control Panel on your computer.
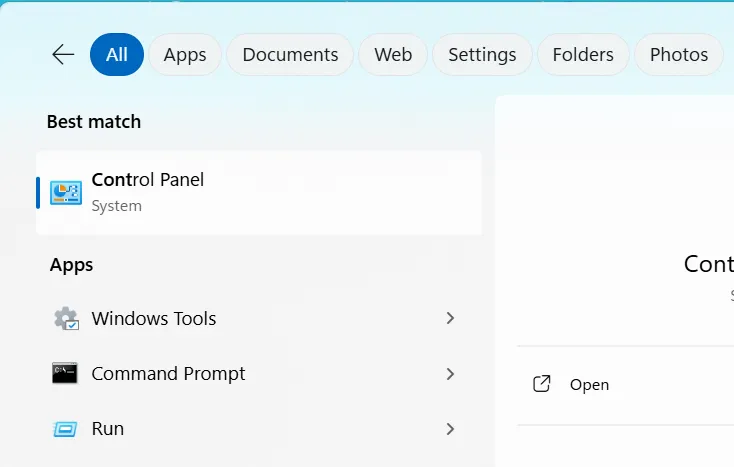
Step 2: Click on Change date, time, or number formats.
Step 3: In the Region window, go to the Formats tab.
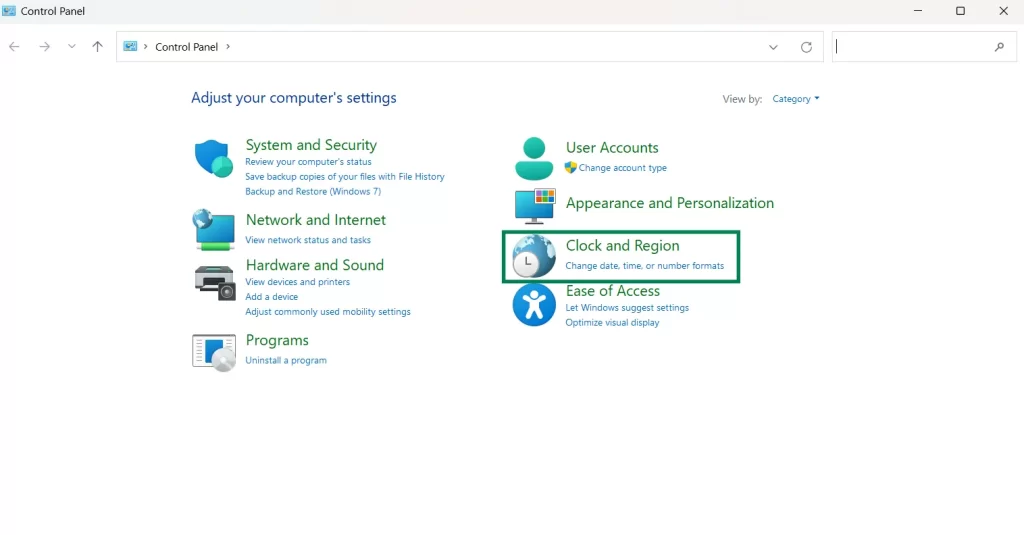
Step 4: Change the Short Date or Long Date format.
Step 5: Click Apply.

Now, the new formats will appear in Excel.
Method 3: Custom Date Formats
If the default formats don’t work for you, you can create your own custom format:
Step 1: Select the cells with the dates.
Step 2: Press Ctrl + 1 to open the Format Cells dialog box.
Step 3: Go to the Number tab and select Custom.
Step 4: Type the format you want (e.g., dd-mmm-yyyy).
Step 5: Click OK.
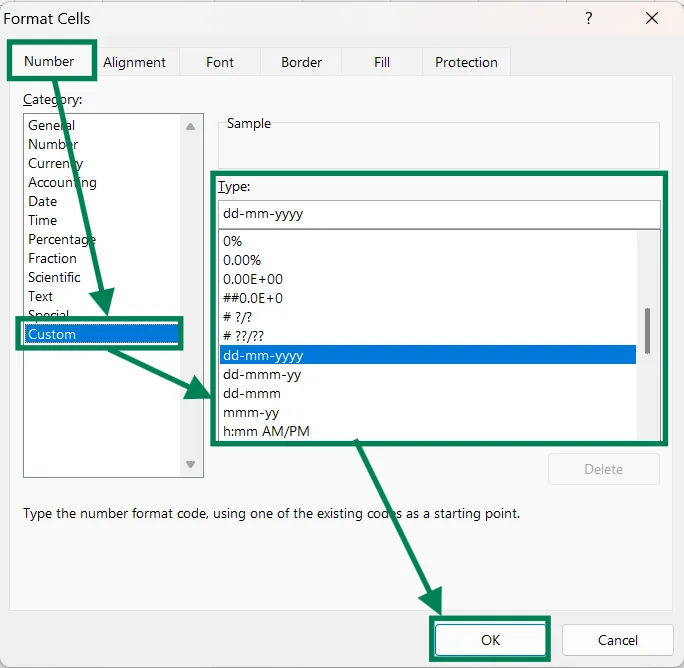
You can also use codes like “dd” for day, “mmm” for month, and “yyyy” for year to create your format.
Method 4: Dates in Text Format
Sometimes, dates are stored as text in Excel. To fix this:
- Use the DATEVALUE function to convert text dates into numbers.
- Once converted, you can format them as dates.
For example, if the date is in cell A2, use:=DATEVALUE(A2)
Method 1: Using the TEXT Function
You can also use the TEXT function to format dates as text. For example:=TEXT(A2, "dddd, dd-mmm")
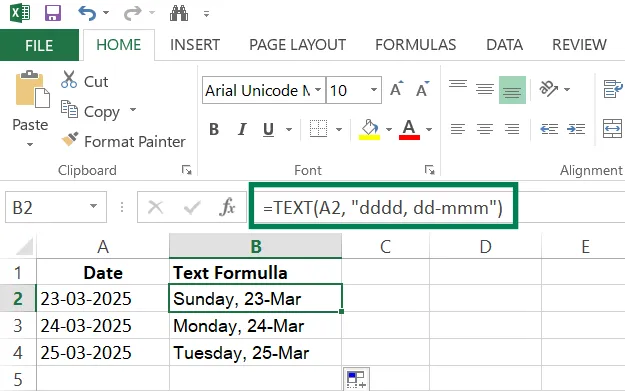
This will show the day name and date (e.g., Monday, 01-Jan).
Also Read: How To Add Serial Number In Excel
Common Issues While Changing Date Format
- Dates as Hashtags: This happens if the column is too narrow. Just widen the column.
- Negative Dates: Excel doesn’t allow negative dates. Use the ABS function to fix this.
- Wrong Format: If Excel doesn’t recognize the date format, it won’t work. Make sure the dates are in a proper format.
This guide covers how to change date formats in Excel using the ribbon, custom formats, and functions like DATEVALUE and TEXT. It also explains how to handle common issues like dates in text format or hashtags.
Also Read: How To Change Cell Size In Excel
Conclusion
In conclusion, changing dates formats in Excel is an easy and useful tool. It lets you show dates in a way that works best for you. You can choose from ready-made formats or make your own.
Excel gives you the freedom to format dates the right way. If the format doesn’t work as you expect, double-check your regional settings. Learning how to format dates well will make your data clearer and more professional.
Thank you for reading till the end!